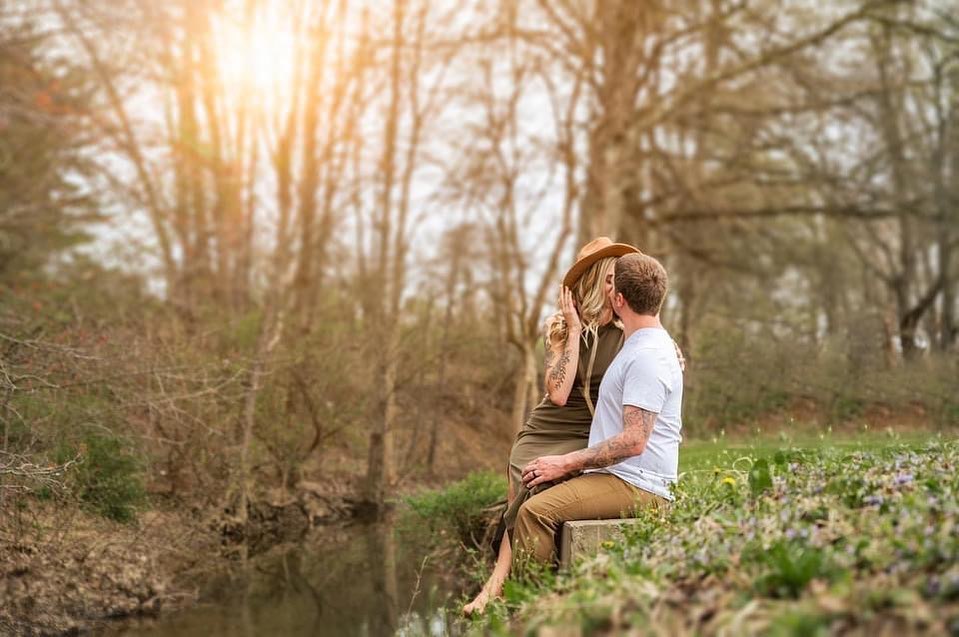
I want to share my editing techniques because I always get questions for clients and new photographers asking how I achieve bold, warm tones. It is important to edit images according to brand and style so that a potential client can know what to expect from you. This does not mean you can’t offer an airy and a moody edit, you just need to have clear expectations to avoid any disappointment.
Adobe Lightroom: Basic Overall colors
First, I begin the process by loading all of my RAW files into Lightroom. A RAW file is an unedited file that allows more options in post process then your typical JPEG image. This is a HUGE component when trying to achieve a desire look because JPEG files are limited on what can be altered.
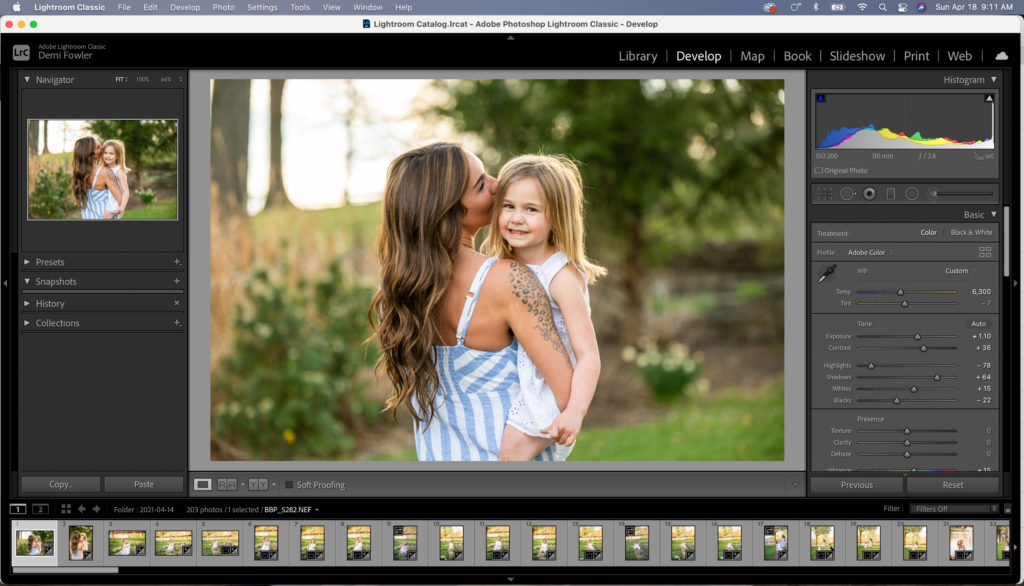
I begin the editing process once all files have been loaded into Lightroom. Some photographers like to cull their galleries before editing but I prefer to cull as I edit. Culling is where you eliminate any photos that you are not completely satisfied with. I begin with a basic edit by adjusting the exposure, contrast, raise shadows, and sharpness. You can play around with these settings until you are happy with the overall appearance.
Next, I use the HSL (hue, saturation, luminance) tool and adjust any specific colors that need editing. For example, in the summer months, I will lower the green saturation to make the grass appear natural. You also can use this to adjust a red undertone within your clients skin tone – super helpful when editing newborns.
Finally, I finish my Lightroom editing with the color grading tool. This tool can do wonders to a RAW file. I select the highlight tool and edited to a warm orange hue to mimic the sunset. This is how you achieve a golden hour glow even if your session is not at golden hour. Take some time to play around with all the options.
Adobe Photoshop: Adding bokeh to your background
Many say editing in Photoshop is frightening but, like anything, practice makes perfect. I am nowhere close to perfect with this software but I am better then where I was a year ago.
After transitioning my image from Lightroom to Photoshop, I begin by duplicating the background layer. This step is SUPER important because it acts as your silver lining. No mater how you alter your image, you will always be able to fall back on the original. From here, I turn the copied image into a smart object by right clicking and selecting the appropriate option.
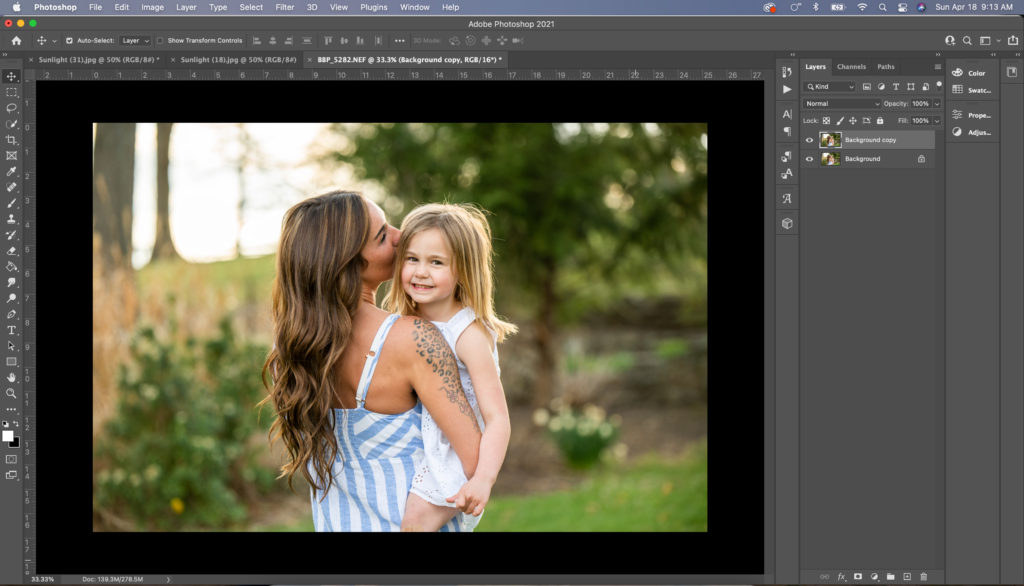
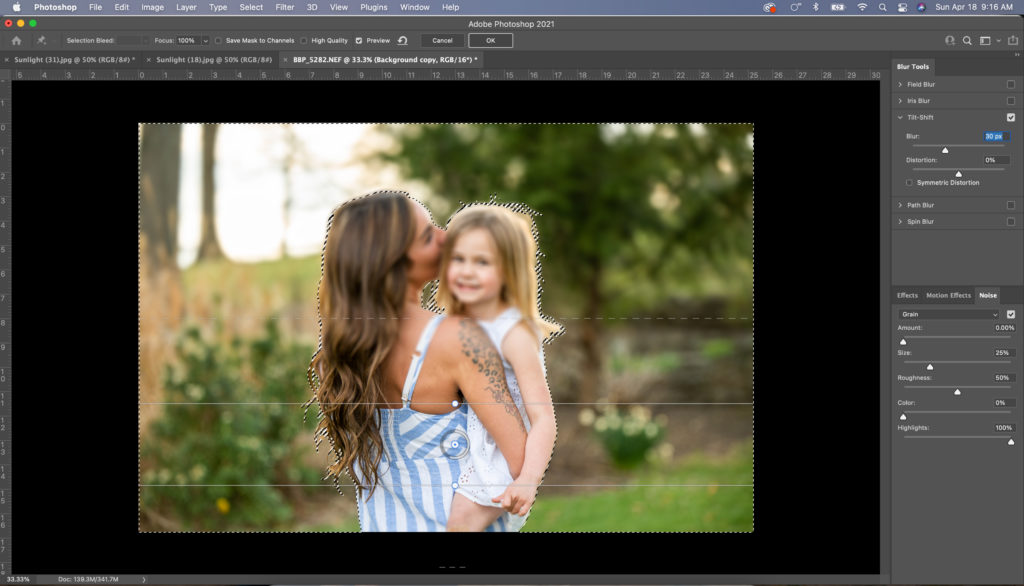
This is where the fun begins. My next step is to select my subject. You want the selection to be pretty clean but it does not have to be perfect. The best part about layers in photoshop is you can always go back and fix something when editing.
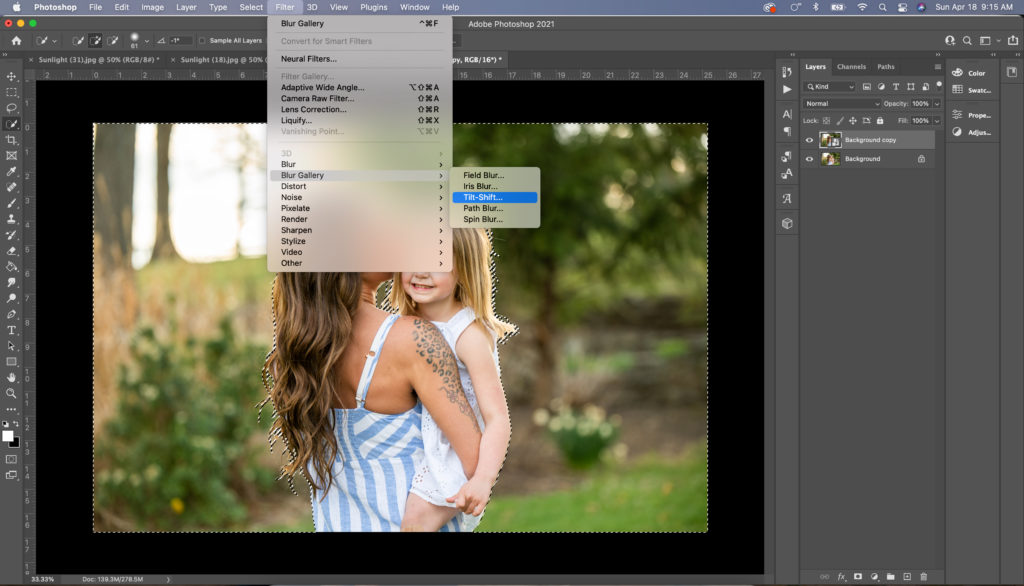
Next, inverting the selection. This is important because it tells Photoshop to only apply edits to the background. We do not want the bokeh effect over our subject. Follow this step with selecting filter, gallery blur, tilt shift. The tilt shift blur allows us to create depth of field within our image resulting in a more natural bokeh. Play around with the settings until you find what feels right for your photo. You will be able to apply a layer mask and brush back in any areas that need to be brought back into focus such as hair strands.
Overall, this is my process from start to finish. There are more details within the video so be sure to watch that more a more specific step by step guide.
Editing Results: Before & After